Creating Your Own Enamel Pins: A Simple Guide & FAQs
Enamel pins are a fantastic and inexpensive way to express your creativity, promote your brand, and share your unique designs with the world. Contrary to popular belief, the process of ordering your own enamel pins isn’t complicated at all. In fact, it’s straightforward and you can typically have them in weeks. Let’s dive into the steps involved to bring your pin design to life.
1. Prepare or Create Your Art File
Before production begins, you’ll need to make an artwork file (or just have us do it for you). Here are some tips for an effective pin design:
Simplify: Remember that pins are small canvases. Opt for clean lines and minimal details to ensure clarity.
Bold Lines and Vibrant Colors: Thin lines and muted colors may not stand out. Use bold lines and strong colors to make your design pop.
Avoid Gradients & Shading: Since pin colors are defined by lines, shading won’t work. Stick to flat colors.
File Types: Vector files are always best but we can work with almost any high-quality file.
2. Decide on Pin Material(s)
The two most common pin formats are Hard Enamel and Soft Enamel:
Soft Enamel Pins
The metal is raised and the enamel is recessed.
Textured pin surface allows for more detail.
Slightly lower cost sometimes.
Made from die-struck iron metal, electroplated, and optionally coated with epoxy.
Thinner feel compared to Hard Enamel pins.
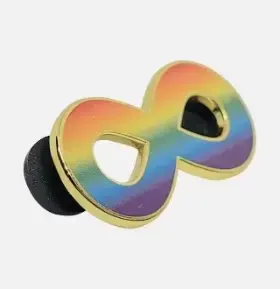
Hard Enamel Pins
Thin metal lines separating each color*.
Has a smooth, hard enamel finish.
Made from die-struck iron metal, heated, and polished.
Extra-high-quality look.
*Printing can be added to have some colors that aren’t separated by the metal lines.
We also offer metal-only pins with no enamel, and full-color, offset-printed pins with a full color image and clear enamel.
Both types of enamel pins have their merits, so choose the one that best suits your design and vision.
Remember, creating enamel pins is an exciting journey. Whether you’re a seasoned pin-maker or a beginner, let your creativity shine.
3. Choosing the Right Pin Size
Now that your artwork and pin material are ready, it’s time to decide on the size of your enamel pins. Here are some considerations:
Smaller Pins (0.75-1.25 inches):
Advantages: Easy fit on any surface, and lower cost due to less material usage.
Limitations: Smaller size may restrict intricate design details.
Larger Pins (1.25 inches and up):
Advantages: More canvas for detailed designs.
Limitations: Larger pins may have limited placement options (e.g., hats).
4. Determine the Quantity
We have a minimum order requirement of just 50 units for most pins (even lower for printed pins). Predicting demand can be challenging, but enamel pins are relatively inexpensive, so it might make sense to go to the next price break quantity. But if you under order, no sweat! Just let us know and we’ll get ’em going!
Always use two pin-backs per pin! Why? Single pin-backs allow pins to spin, jiggle, and may lead to loss. Avoid this mistake—secure your pins with two pin-backs. It’s usually just a quarter or so.
6. Pick Your Backers
We have a lot of backing options, and the most common are rubber clutches. But we’ve got deluxe metal ones, screw-on jewelry clutches for extra security, and many more for those so inclined.
And if you want to step up your presentation a bit, you can add printed backing cards and/or clear plastic retails bags. They’re surprisingly inexpensive, and completely optional.
That’s it! You’re ready to go. Just send us your details and we’ll get them going!